By now, you should be comfortable with the basics of the Spring Boot framework and its advantages and basic features.
From this tutorial onwards, you are going to deep dive into the advanced features of Spring Boot and how to customize them as per your need.
The following sections gives more details about the advanced features of Spring Boot framework
Table of Contents
Bootstrapping the Application
Bootstrapping refers to the initialization of an application with the required resources.
- In the Spring Boot, the bootstrapping is achieved through the SpringApplication.run() method call from the main() method as shown in the following code snippet:
@SpringBootApplication
public class DemoApplication {
  public static void main(String[] args) {
    SpringApplication.run(DemoApplication.class, args);
  }
}
- By default, in a Spring Boot application, only the INFO logging message will be displayed. If you need to set any other logging levels, you can refer to the chapter on Logging Levels.
Start up Failures
Spring Boot provides a number of auto-registered “Failure Analyzers” that provides a detailed message on what went wrong during the application start-up and also suggest the corrective action to be taken to resolve the issue.
For Example, if you try to start your application on port 8080 which is already being used by another process, you should be seeing the following message displayed to the user:
***************************
APPLICATION FAILED TO START
***************************
Description:
Embedded servlet container failed to start. Port 8080 was already in use.
Action:
Identify and stop the process that's listening on port 8080 or configure this application to listen on another port.
Even if no Failure analyzers are able to handle the exception, you can still find the root cause of the error by enabling the debug property as follows:
java -jar demoApplication.jar --debug
Spring Boot Banner Customization
You can customize the appearance of the banner displayed at the start-up of a Spring Boot application by adding banner.txt file to the classpath. This file contains variables as shown in following table:
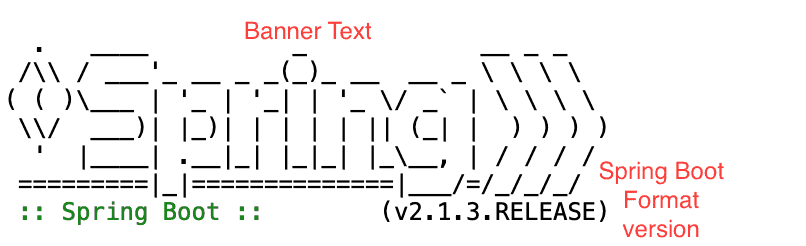
Alternatively, you can also set the property spring.banner.location to the location of the banner.txt file in application.properties
Variables present in banner.txt file
${application.version} | The version number of your application, as declared in MANIFEST.MF. For example,Implementation-Version: 1.0 is printed as 1.0 |
${application.formatted-version} | The version number of your application, as declared in MANIFEST.MF and formatted for display (surrounded with brackets and prefixed with v). For example(v1.0). |
${spring-boot.version} | The Spring Boot version that you are using. For example 2.1.3.RELEASE. |
${spring-boot.formatted-version} | The Spring Boot version that you are using, formatted for display (surrounded with brackets and prefixed with v). For example (v2.1.3.RELEASE). |
Passing Command Line Arguments to the Application
- Command line arguments are used to provide run-time data or to override the default Spring Boot configurations.
- By default, Spring Boot application converts the command line argument as a property and add it to the environment. The command line arguments takes precedence over any other property sources.
- In this section, we will see how the application arguments are passed and accessed in a Spring Boot application.
Refer the following main SpringBootApplication class:
package com.example.demo;
import java.util.Arrays;
import org.slf4j.Logger;
import org.slf4j.LoggerFactory;
import org.springframework.boot.ApplicationArguments;
import org.springframework.boot.ApplicationRunner;
import org.springframework.boot.SpringApplication;
import org.springframework.boot.autoconfigure.SpringBootApplication;
@SpringBootApplication
public class DemoApplication implements ApplicationRunner{
  private static final Logger logger = LoggerFactory.getLogger(DemoApplication.class);
  public static void main(String[] args) {
    SpringApplication.run(DemoApplication.class, args);
  }

  @Override
    public void run(ApplicationArguments args) throws Exception {
        logger.info("Command Line Arguments passed: {}", Arrays.toString(args.getSourceArgs()));
        logger.info("Non-Option Arguments: {}", args.getNonOptionArgs());
        logger.info("Option Arguments: {}", args.getOptionNames());
        for (String name : args.getOptionNames()){
            logger.info("argument-" + name + "=" + args.getOptionValues(name));
        }
        boolean containsOption = args.containsOption("name");
        logger.info("Contains Name: " + containsOption);
    }
}
Notice the following points from the above code:
- When we pass the arguments to a Spring Boot application, it creates a bean of type ApplicationArguments, loads it with the arguments and sets it within the Spring Context.
- Notice that in the above code, we have overridden the run() method and passed the ApplicationArguments as an argument.Now, we can use this bean to access the arguments.
1. Arguments passed with — as prefix are “Option Arguments”.
2. Arguments passed directly without any prefix are “Non-option Arguments”.
- Also, note that the main class must implement the “ApplicationRunner” Interface.
You can now run the application in any of the following options:
Option 1
Now, to pass the arguments and run the above application from STS/IntelliJ, go to:
- Right Click on Project -> Run As -> RunConfigurations -> “Arguments” tab and pass the sample arguments as shown below.
- Click on Run

Option 2
Alternatively, if you have packaged the application as a JAR and are running the application using the java -jar command, you can pass the arguments as follows:
$ java -jar demoApplication.jar this-is-a-non-option-arg –server.port=9090 –name=tutorialcup.com
Console Output
You should be able to see the following output (Highlighted below) when you run the application in any of the options mentioned above:
  .   ____          _            __ _ _
 /\\ / ___'_ __ _ _(_)_ __  __ _ \ \ \ \
( ( )\___ | '_ | '_| | '_ \/ _` | \ \ \ \
 \\/  ___)| |_)| | | | | || (_| |  ) ) ) )
  '  |____| .__|_| |_|_| |_\__, | / / / /
 =========|_|==============|___/=/_/_/_/
 :: Spring Boot ::        (v2.1.3.RELEASE)
2019-03-23 01:13:17.987  INFO 39347 --- [  restartedMain] com.example.demo.DemoApplication         : Starting DemoApplication on m-c02qg7nkg8wn with PID 39347
2019-03-23 01:13:19.103  INFO 39347 --- [  restartedMain] o.s.b.w.embedded.tomcat.TomcatWebServer  : Tomcat initialized with port(s): 9090 (http)
2019-03-23 01:13:19.133  INFO 39347 --- [  restartedMain] o.apache.catalina.core.StandardService   : Starting service [Tomcat]
2019-03-23 01:13:19.134  INFO 39347 --- [  restartedMain] org.apache.catalina.core.StandardEngine  : Starting Servlet engine: [Apache Tomcat/9.0.16]
2019-03-23 01:13:19.214  INFO 39347 --- [  restartedMain] o.a.c.c.C.[Tomcat].[localhost].[/]       : Initializing Spring embedded WebApplicationContext
2019-03-23 01:13:19.214  INFO 39347 --- [  restartedMain] o.s.web.context.ContextLoader            : Root WebApplicationContext: initialization completed in 1184 ms
2019-03-23 01:13:19.617  INFO 39347 --- [  restartedMain] o.s.b.w.embedded.tomcat.TomcatWebServer  : Tomcat started on port(s): 9090 (http) with context path ''
2019-03-23 01:13:19.621  INFO 39347 --- [  restartedMain] com.example.demo.DemoApplication         : Started DemoApplication in 1.904 seconds (JVM running for 2.611)
2019-03-23 01:13:19.622  INFO 39347 --- [  restartedMain] com.example.demo.DemoApplication         : Command Line Arguments passed: [--spring.output.ansi.enabled=always, this-is-a-non-option-arg, --server.port=9090, --name=tutorialcup.com]
2019-03-23 01:13:19.624  INFO 39347 --- [  restartedMain] com.example.demo.DemoApplication         : Non-Option Arguments: [this-is-a-non-option-arg]
2019-03-23 01:13:19.624  INFO 39347 --- [  restartedMain] com.example.demo.DemoApplication         : Option Arguments: [spring.output.ansi.enabled, server.port, name]
2019-03-23 01:13:19.624  INFO 39347 --- [  restartedMain] com.example.demo.DemoApplication         : argument-spring.output.ansi.enabled=[always]
2019-03-23 01:13:19.624  INFO 39347 --- [  restartedMain] com.example.demo.DemoApplication         : argument-server.port=[9090]
2019-03-23 01:13:19.624  INFO 39347 --- [  restartedMain] com.example.demo.DemoApplication         : argument-name=[tutorialcup.com]
2019-03-23 01:13:19.624  INFO 39347 --- [  restartedMain] com.example.demo.DemoApplication         : Contains Name: true
Conclusion
In this tutorial, we have learnt the features of SpringApplication and how to customize the SpringApplication. In the next tutorial, we will deal with various logging levels and how to customize the logging levels as per our requirement.