- Spring Boot contains a number of features to help you monitor and debug a production application.
- In other words, it enables production-ready features in a Spring Boot Application.
- Monitoring the crucial information of an Application like run time metrics, health, traffic, state of the Database etc.. becomes very easy with Actuators.
- All these statistics are exposed over pre-defined endpoints over HTTP or JMX once the Spring Boot actuator dependency is detected in the classpath. No need to write custom code to implement these features.
- As with any Spring modules, these actuators are also customizable as per our needs.
- In the following sections, we will add actuator support to the project, enable the Actuator endpoints, add security to the endpoint, and customize an endpoint to our needs.
Table of Contents
Adding Actuators Support to our Project
- To add actuators support in our project, please add the following dependency in Maven pom.xml
<dependency>
  <groupId>org.springframework.boot</groupId>
  <artifactId>spring-boot-starter-actuator</artifactId>
</dependency>
- If you are using gradle, add the following gradle dependency:
dependencies {

        compile("org.springframework.boot:spring-boot-starter-actuator")

}
Enabling Actuator Endpoints
Actuator endpoints let you monitor and interact with an Application. There are many Out of the Box endpoints supported by Spring Boot and you can add your own custom endpoints as well.
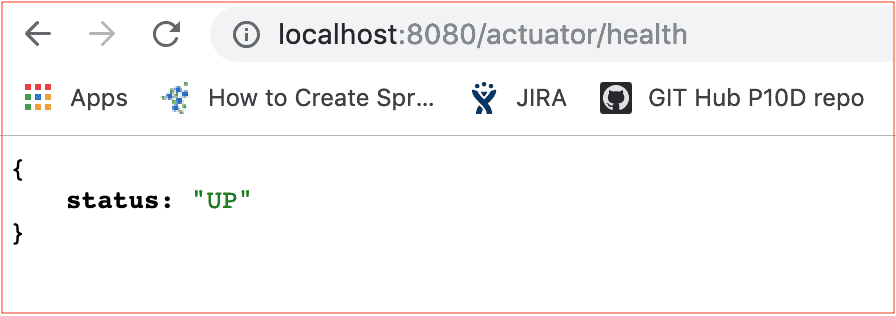
For example, in order to monitor the health of an application, there is a endpoint with id “health” and it is accessible with /actuator/health
- Each of the endpoints can be individually enabled or disabled.
Note:By default, all the endpoints are ENABLED except “SHUTDOWN”
- To enable a specific endpoint, you can use the following property:
management.endpoint.<ID>.enabled
- For instance, to enable shutdown endpoint, change the property as follows:
management.endpoint.health.enabled = true
- Some of the main endpoints are shown below:
- health – Displays the Application’s Health Information.
- beans – Displays all the available beans in the application.
- info – Displays information related to the application. The type of information to be displayed can be configured in the application.properties
- mappings – Displays the list of all available @RequestMapping Paths.
- metrics – Shows the metrics related to the application.
- auditevents – Exposes the audit events for the application
You can refer the following link to have an exhaustive list of all the available endpoints:
Exposing the endpoints
- Since endpoints may contain sensitive information, utmost care must be taken on who can access the endpoints. Because of this reason, only two endpoints /info & /health are exposed by default.
- Please view the response of ‘/health’ and ‘/info’ endpoints:

- Notice that, there is no data in the above /info endpoint. We need to configure some data for the info endpoint as follows:
info.demo.name=Spring Actuator Example
info.demo.version=2.1.3
info.demo.desciption=A sample Spring Info Actuator
- Now restart the server and hit the same info endpoint. You will see the response as shown in the following screen:

- If you need to expose all the endpoints, add the following property:
management.endpoints.web.exposure.include=*
Customizing the endpoint paths
- Spring boot uses the “/actuator” as a prefix for all the endpoints. If you need to customize this prefix, you can do so by adding the following property:
management.endpoints.web.base-path=/healthcheck
- Now, you can access the info endpoint using the “/healthcheck”(instead of “/actuator”) as a prefix as shown in following screen capture:

Endpoint Security
- Since the endpoints may contain sensitive information, it is always a good idea to secure the endpoints.
- In order to secure the application, add the following spring security dependency to pom.xml :
<dependency>
    	<groupId>org.springframework.boot</groupId>
    	<artifactId>spring-boot-starter-security</artifactId>
</dependency>- Add the username and password in application.properties as follows:
spring.security.user.name=bhanu
spring.security.user.password=password
- Now, when you restart the application and try to access non-default endpoints (any endpoint except /info and /health), you will see the following login screen. Login with the above configured credentials:

- For example, access the following secured endpoints now:

To conclude, in this section, we have learnt how to configure spring security in a spring boot application.
The following section will give you an overview of creating custom end points.
Creating custom endpoints
You can create a custom endpoint using the following annotation on the class definition:
- @Endpoint
You can also consider using the following annotations:
@WebEndpoint – Used for creating endpoints using Web MVC Framework.
@JmxEndpoint – Used for creating endpoints using JMX
- For example, refer the following code to create a Custom Endpoint:
package com.example.demo;
import org.springframework.boot.actuate.endpoint.annotation.Endpoint;
import org.springframework.boot.actuate.endpoint.annotation.ReadOperation;
import org.springframework.context.annotation.Bean;
import org.springframework.stereotype.Component;
@Endpoint(id="myCustomEndpoint")
@Component
public class CustomEndPoint {

  @ReadOperation
  @Bean
  public String welcome() {
    return "Welcome message from the Custom Endpoint";
  }
}
- Also, make a note of the following annotations used in the above code:
- @Endpoint(id=“myCustomEndpoint“) – The unique ID for the endpoint is “myCustomEndpoint”.
- @Bean – Expose the methods as an endpoint bean.
- @ReadOperation – Indicates that this method is used to serve read operation.
- When you re-start the application and hit the endpoint url:
https://localhost:8080/healthcheck/myCustomEndpoint
- You can expect the following output indicating that the endpoint is registered with the application context:

Conclusion
To conclude, in this tutorial, we have learnt the power of Spring boot actuators and its usage along with the customization of endpoints. In the subsequent tutorials, we are going to learn about the advanced features of Spring Boot and how to customize them as per the need.